

December 30, 2014
Have you ever had a leaky roof leave a water stain on your ceiling? Has your home settled over the years and you are starting to see stress fractures and nail heads popping out of the drywall? These are the most common problems with ceilings and unless they are addressed, they can be quite an eye soar. If you are ready to tackle the project yourself, follow these simple tips and keep your home beautiful for years to come.
Find Out What Caused the Issue in The First Place
If you are dealing with water damage, it is important to address what caused it. If it is a ceiling on the first floor, it is likely due to a leaky pipe from an upstairs sink, toilet, or tub. If it is a ceiling on the second floor, it is likely due a leak in the roof. Stress fractures and nail pops can be a more difficult issue to remedy. It could be as simple as bad carpentry or as complex as deterioration in the foundation. In either case, make sure you fix the problem first before you do any repairs.
Prep the Room
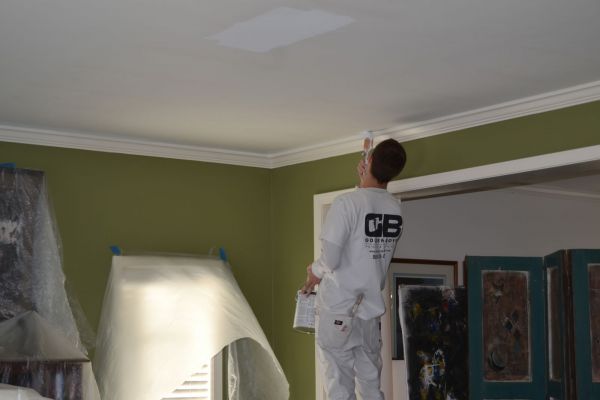
Whenever we are called in to paint a ceiling, there is a tried and true method that we always follow. We start by purchasing a roll of 1 mil 9’ by 400’ plastic from any home improvement store. Starting from the top of the wall, cut a length of plastic that will cover from the ceiling to the floor and tape it with painters tape as close as possible to the ceiling. This is repeated along the perimeter of the room until all of the walls are draped in plastic. We then move any misc. furniture in the center of the room, cover it in plastic and lay drop clothes down to cover the floor. The goal is to be able is to be able to work around the perimeter of the room and prevent any paint splatters from landing on the floors, walls, or furniture.
Fix the Problem
Water damaged areas will need a primer coat first or the spot will always come back. A lot of people will use oil primer but in my experience, oil is difficult to work with and can leave a sheen flash once you top coat with ceiling paint. I prefer a water based primer and will coat the area with a ½” roller cover 3-5 times over the course of a day until the spot has disappeared. If you are dealing with small cracks, caulk the crack first and then spackle over it to prevent any reoccurrence. Larger cracks will require some joint tape and some heavy duty joint compound or it will reappear in no time. In regards to nail heads, many times we will pull these out, replace them with screws, and spackle the area. Be sure to sand the areas smooth with a 180 grit sandpaper before painting.
Paint the Ceiling
Every paint company carries a line of paint that is specifically made for ceilings. They will all have a flat finish and run approximately $20 a gallon. Make sure you buy enough to two coat the ceiling and you can always take back any extra. Start by cutting in around the perimeter of the ceiling making sure not to get paint on the walls. If you are not confident in your ability to paint a straight line, run a piece of 2” painters tape around the perimeter of the room on the walls. Once you have cut in the room, cut in any light fixtures or remove them before painting. Use a ½” nap roller cover and work out from one corner of the room. Move quickly so that your line dry does not dry which will create unsightly lap marks. After a few hours, repeat the process again and you will be ready to clean.
When you walk into a room, your eye is supposed to be drawn to the furnishings and paint color but an unsightly stain or crack will always be the first thing you see. If you are dealing with these issues in your own home, follow these tips and you will have a freshly painted ceiling in no time.